Friday, December 10, 2010

Date night! Tuna stuffed peppadew peppers.


Last Saturday I made rice pilaf, and tuna-stuffed cherry peppers. The pilaf was ok, but the flavor was so much mellower than the Big Wow Mouthful that came from the cherry peppers that I wouldn't pair them up again. The pilaf was very soothing, but it just couldn't keep up with the peppers. Something more acidic, like a salad with a vinaigrette, is called for here.

On Wednesday, I brought some of the leftover cherry peppers to work for lunch. And half-way through lunch, I noticed something interesting. During most lunch hours, I just shovel away until I feel full, have another bite or two, and go back to whatever I was doing. This is why I used to be convinced that there's no way that Mediterranean diets would work for most Americans: we're just used to high volume, and almost-good-enough quality. So, we shovel away, while we go on with our lives. No wonder we all talk with our mouths full.

But I wasn't doing that with the stuffed peppers. Individiually, each stuffed pepper isn't a mouth-filler in terms of volume. But between the sweet and spicy peppers, the tuna, the turmeric, and the balsamic, there's a lot of flavor going on, so it's actually more enjoyable to eat only one at a time, at a more relaxed pace. As a result I found myself enjoying my lunchtime more slowly, and in a more contemplative mood. This was a much different kind of experience for me, and it's setting the bar, I think, for what to look for in a meal, and in a recipe.

I'll be making these again, but this time I'll be making them to bring in for lunch... for a week.

This recipe was adapted from the version published by Eating Well, which called for capers instead of turmeric.

Ingredients for stuffed cherry peppers:

-2, 16 oz jars of peppadew peppers.
-3 cans of white albacore tuna in water
-Extra Virgin Olive Oil
-Fresh lemon juice.
-Fresh lime juice. (optional)
-Turmeric
-Balsamic vinegar.

Peppadew peppers: Trader Joe's has them, Whole Foods has them. I'm sure other stores have them, too... typically near the olives. I got some from Whole foods that morning, and went back to TJs to get more later on. Whole Foods cost twice as much, but the peppers were a lot less squishy, and easier to stuff, so it's a draw, really.

To prepare the tuna for stuffing into the peppers, you mix it with the olive oil, lemon juice, and turmeric. I'd never really worked with turmeric before. I know that it's one of the spices that make up curry as we know it, but it was still new to me. The first thing worth mentioning is that it will stain anything yellow. So don't make more of a mess than you have to. It has its own flavor, and there's definitely a threshold where it's just overpowering. So, I spent some of Saturday afternoon experimenting with proportions.

I think it's worth doing the experimenting to see just what your own taste buds are ok with. Even more turmeric started to make the tuna taste less fishy, which I liked, but the flavor from the spice was simply overpowering. It's also worth doing the experiments with the peppadew peppers on hand: the combined flavors can be interesting. I kept half of a lime on-hand that I would lick in between tastings to clear my palate, so that I could taste the differences. I had to... after a while, everything just tasted like EVOO and turmeric, and it was hard to tell the differences between the different mixes.

What I came up with, I think, was something close to 3 tbsp of EVOO, 2 tbsp of lemon juice, 1 tbsp of lime juice, and 1.5 tbsp of turmeric. Combine this mixture in a bowl with the tuna, and mix it up with a fork.

There's not much preparation that needs to be done to the peppers, just strain them. I set the steamer into one of my sauce pans to catch all of the brine from the jar. Not every pepper is going to be physically intact enough to be stuffed, and this way I was able to put the brine back in the jar with the leftover peppers, to be used in something else. And the steamer worked well enough as a work bowl, so I could sort through what was there, instead of fishing them out of the jar.

While I know it should go unsaid that you should wash your hands before cooking just about anything, this is one of those times when you're really going to be touching pretty much everything... you'll be holding a pepper in one hand, and using a combination of fork and finger to push the tuna into the peppers. Clean fingers are critical.

I used a casserole dish to hold the peppers after they'd been stuffed.

The last step was to pour about 1/4 cup of balsamic into a pan of some kind, and simmer it down for a while, until there's about 2 tbsp worth of balsamic glaze. I used more, and reduced it further. What I ended up with was basically caramel in consistency. I did the reducing in the afternoon, put the result in a small glass bottle, and put it into the fridge. I had to microwave the bottle to get the glaze to pour out.

Pour the glaze over the prepared peppers. And enjoy... slowly.

German apple pancake


This is a great recipe that I found a month or so ago. I've made it a few times, and served it up to a bunch of folks at a brunch that we had at our house a few weeks ago. Among other things, we also served up some thinly sliced kielbasa that we'd fried up in a pan on the stove. Somehow, someone discovered that the two things pair up very well... a great combination of sweet and savory.

The version you see in the photos is a scaled down version for one person, made in a 6" skillet. But the recipe itself, and the portions I'm going to list, are for a 12" skillet.

Ingredient list:
 
-1/4 stick of butter for the frying pan
-1/4 stick of butter, chopped up, to go into the food processor.
-2-3 apples, cored and cut into small pieces. Use granny smith, or something else that's nice and tart.
-1/2 cup milk
-1/2 cup flour
-4 eggs
-3 tbsp brown sugar to go into the food processor
-1 tsp vanilla
-1/4 tsp salt
-3 tbsp brown sugar to be sprinkled on the apples
-1/4 tsp ground cinnamon to be sprinkled on the apples

Step one: Pre-heat the oven and the skillet. Turn the oven up to 450, and get hte skillet warmed up to medium-low.


Step two: Saute the apples in butter. This is pretty simple, really. Butter in pan, apples in butter.


Step three: While the apples are frying up, put the butter, eggs, milk, flour, salt, and vanilla into the food processor to make the batter. (Or mix by hand, your option, but the food processor means I don't have to soften or melt the butter.)

Step four: Once the apples are starting to brown, sprinkle them with brown sugar and cinnamon. Then pour the batter over the apples and move the whole pan into the oven.


Bake at 450 for 12-15 minutes. Serve with powdered sugar, or maple syrup.

Enjoy.

Thursday, December 2, 2010

Simple pasta and steamed veggies

It's pretty impressive that this dish hasn't made it on here already. I chalk it up to the effect that this blog has had on our kitchen. I'm trying a lot of new things and cooking a lot of new recipes. And writing about it, of course.
This is a quick and simple dinner that we've been enjoying for years. It was something I threw together one night out of sheer hungriness and a need for FOOD. While it's very simple, it does require a steamer basket that nests into the top of your regular saucepan, and use the same lid. It's not hard to find a setup like this when you're shopping for pots and pans. And I recommend the combination to people precisely because of this recipe. It's a serious production time saver.

Step 1: Chop up some vegetables into bite-sized hunks and throw them in the steamer basket. For this recipe, I used 2 heads of broccoli, a bundle of asparagus, and an onion.

Step 2: Fill the pot 2/3 with water. Don't overfill, as the steamer does take up some space in the saucepan, and it will displace the water onto your stove. (Note paper towel on the stove)

Step 3: Put the steamer on top of the pot, and the lid on the steamer.

Step 4: Turn on the stove and heat up the water for pasta.

Step 5: Throw in the pasta, and cook.

Step 6: Take the stack to the sink, and dump the pasta on top of the veggies in the steamer to strain.

Step 7: Dump the steamer into the serving bowl.

Step 8: Drizzle olive oil over everything, and move the pasta around enough to let the oil keep it all from sticking together. Serve with Salt, Pepper, and maybe some Romano or Parmesan.

As the water heats up to boiling, it warms up the veggies, and they steam while the pasta's boiling. When the pasta's done, the veggies are done. No muss, no fuss.

It's really amazing what the simple combination of oil, salt, and pepper can do for steamed veggies. And the cheese is salty enough to chime in pleasantly. Years ago I used to mix in goat cheese and cream and other stuff. But I've been trying to eat better lately, and I have to say, in this case, simpler is really better.

There are other veggie combinations thatare worth trying, like:
-zucchini, chick peas, and shallots
-Broccoli, Cauliflower, and summer squash
-Red peppers, spinach, black beans, and apples
-Use your imagination. Vegetables are vegetables, and some mix better than others, but almost all are good.

Monday, November 29, 2010

Whole Wheat Banana Bread


I can't tell you how many metric tons of Bananas I've thrown out over the years. I buy a bunch, with best intentions, eat a few when I get home, watch over the course of a few days as they get spotty, and then one day, I notice that they're too soft to eat, and the fruit flies have noticed. The irony inherent in this is, the bananas are almost ready to be made into banana bread at this point... and I've been throwing them away. They're black gold! (ew)

I've been saving over-ripe bananas in the freezer. It's really the best place for it. Right before they're pretty much gone, I freeze them. We came home from the grocery store last night, and I ran out of room in the freezer. So today, I decided, was banana bread day. I pulled the bananas out... and woke up to a puddle of slime on the counter, under some truly black and gnarly ugliness. One of the bananas was so soft inside, the peel had kinked a bit under its own weight, and started to ooze all over the top of the kitchen island. Not exactly what I'd call appetizing. And far beyond what I'd ever considered keeping.

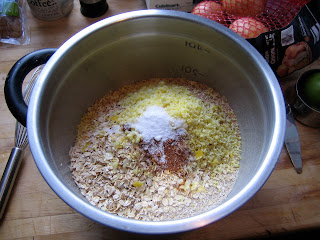
This is a picture of the bowl with most of the ingredients. Note the presence of a buttery yellow. This is the color of the bananas. Kinda gross, right?

This recipe is adapted from the King Arthur Whole Grain Baking cookbook:

The ingredient list:

-3-4 way over-ripe bananas
-1/2 stick of butter
-1/2 cup packed brown sugar
-1 tsp vanilla extract
-1/2 tsp salt
-1/2 tsp ground cinnamon
-1/4 tsp ground nutmeg
-2 eggs
-3/4 tsp baking soda
-1/4 cup honey
-2 Cup whole wheat flour

The recipe calls for 1/2 cup of walnuts. But I hate walnuts. And the last time I had this bread, it was made by my then-roommate with chocolate chips and craisins. (Seth is clearly a genius) Good enough for me... so I added a fistful of each, as well as a little bit of black strap molasses. (yum)

The recipe calls for a 5x9 loaf pan. I used 2, 5x7 casserole dishes.  Whatever your vessel of choice, it needs to be greased. And the oven needs to be pre-heated to 350.

Mix all the liquid and soft ingredients with the sugar and spices until smooth. Then add the flour, chips and craisins. Pour into the dish/ pans/ whatever, and let it sit at 10 minutes at room temperature. Then put into the oven.

After 50 minutes, cover the loaf/ loaves loosely with aluminum foil. 10-12 minutes later, check with a fork, toothpick, whatever. If the cake-checker-outer comes out clean, the banana bread is done. And if I sound a little punchy, it's because the chocolate has entered my system, and I'm a little giddy.

This is some tasty banana bread. I don't know who came up with the idea of making banana bread. But somebody somewhere decided to fly in the face of all logic and slime-nasty bananas, and at this particular moment, I love this person.

As I write this, the loaves have been out for just under an hour. One of the two is almost gone... two pieces to me, two to Ariel, and one into A's lunch bag.

Kielbasa and Eggs for breakfast!

Ariel and I both like to eat eggs for breakfast. Recently, we've been eating them with kielbasa. Ariel has found that it carries her through more of her day than just having eggs for breakfast. And given her grueling schedule of late, that's been really helpful.

The procedure is pretty simple... I take a hunk of frozen kielbasa from the freezer, and slice it into very thin (1mm-ish) slices. That goes into a pre-heated skillet on medium-low, and it starts sizzling right away. And then I cook my eggs. I happened on the idea of using kielbasa after I'd sliced some up and cooked it for another dish. One piece was left in the pan by accident, and burned. Being the kind of guy I am, I picked up the burned piece and stuck it in my mouth. The crispy burned slice tasted just like bacon.

But is it healthy?

Like most Americans, I'm still pretty confused about whether or not eggs are good for you. Good or bad cholesterol, high protein, and so on. There was a recent study at Harvard that noted that men who ate up to 6 eggs per week did fine, but that those who ate 7 or more eggs per week had an increased risk for dying of anything in general. There are a lot of weird things going on in the study, and it's not very conclusive about why or how eggs would be a factor. But, Harvard gives a 6 egg limit, and the Mediterranean diet has a guideline of 4 or fewer eggs per week, so the message I'm taking away is that eggs should be eaten in moderation.

Moderation? I've heard for years that even unhealthy things can be eaten in moderation, and it won't be so bad. I take this with a grain of salt (in moderation) because I've heard for most of my life that some of the best things are REALLY unhealthy. And given what many Americans think of as an acceptable portion, a moderated portion may still be way too much. And given the way our news media functions, I'm waiting for them to come out with a study somewhere that says moderation causes a really ugly, flammable cancer of the sort that would condemn you to the stopped-up bowels of hell.

Thanks to the recent bacon mania, recipes from Bacon Explosion to numerous chocolate-bacon recipes, and even bacon recipes published by a cardiologist in Israel (WTF!!??!!) are running well beyond the bounds of what would be considered even marginally healthy. Bacon dipped in Chocolate is now being served at the same state fairs that made deep-fried twinkies popular. How such an evil coexists so peaceably with Bible Belt baptists is almost beyond me. Holy crap.

Restricting myself to 4-6 eggs a week sounds a lot healthier than a moderated portion of deep fried twinkies and chocolate covered bacon. But I'm not really in a position to point fingers when it comes to my love of fried swine. 

Like any other person who's been exposed, I do have a thing for bacon. And it's hard to wrap the mind around combining 'bacon' in a sentence with 'moderation.' Part of the reason I'm talking about kielbasa and eggs is that I find that kielbasa is a lot easier to use in moderation. The flavor is fantastic. But a little goes a long way, so it's easy to use a small amount. And I don't get the same cravings for kielbasa that I do for bacon.

Kielbasa is the polish word for sausage. It's not a specific recipe. But most of us in the US have a pretty specific flavor in mind when someone says Kielbasa. It's a pork-, or pork and beef- based sausage that's flavored with garlic and marjoram. I've been using regular, full-fat pork or pork/beef kielbasa, because I've found that it just tastes the best. I've tried turkey kielbasa. It smells great while cooking, but has no real flavor. And lite kielbasa's not bad, but it doesn't cook up as well without adding more oil (fat) to the pan. Full fat kielbasa tastes a little better, cooks easier, and it does leave some grease in the pan, so it's clear that some of the fat content is cooking off in the process. But it's not the oil-slick tidal pool of greasiness that you get when cooking bacon.

There are 3 real dietary health issues involved in bacon and its substitutes: Fat, Nitrates and Sodium.

Fat...

I looked up some of the basic nutrition info for this entry, and compared it with bacon.


2oz of bacon (around 4-5 slices): 302 Calories.
Calories from fat: 106: 4g saturated fat.
647 mg of Sodium.

2oz of Hillshire Farm Polish Kielbasa: 100 Calories.
Calories from fat: 140: 0g saturated fat, 6g monounsaturated fat.
570 mg Sodium

(other alternatives, for comparison)

2oz Butterball turkey bacon (4 slices): 140 calories
Calories from fat: 60: 2g saturated fat
540 Mg of Sodium.

2oz (7 strips) morningstar vegetarian strips: 210 calories
Calories from fat:140: 1.75g saturated fat, 3.5g monounsaturated fat, 10.5g polyunsaturated fat
805 mg of Sodium.

Clearly kielbasa isn't the healthiest meat in the world. But it's much better than bacon. (Both are healthier than anything labeled 'breakfast sausage,' but that's a whole other topic. ) And ounce-for-ounce, it's has fewer calories than turkey- or veggie- 'bacon'. Given the vegetarian reputation for being a healthier diet, I was surprised to find that the sodium in the vegetarian option was so much worse than any of the other options.(That said, I don't think it's loaded up with nitrates, so maybe it all balances out.)

Nitrates...

Meat products need to be cured in something to protect us from all kinds of microbial nastiness, and to keep the meat from rotting. And in the case of pork products, it also helps protect us from things like roundworms. Historically speaking, the discovery of how to cure meat was really important. Lacking the option to refrigerate, the ability to preserve meat for a long time enabled people to travel greater distances and explore areas of the globe that had been previously inaccessible.

Historically, meat was cured with salt and sugar. but more modern processes use nitrates, which have been linked with a whole host of health issues, including various kinds of cancer. Bacon is cured. So is Kielbasa. But uncured options have been appearing as people began to understand the health issues. Trader Joe's, of all places, has one of the best-rated uncured bacon options. (I've tried it... it tastes wonderful.) They also have an uncured pork kielbasa that I haven't tried yet... but it's on the list. Given TJ's reputation for quality, affordable food, and my experiences with their bacon, I'm pretty confident.

Sodium is another issue when eating kielbasa. 2oz, or 1/8 of a pound, has around 25% of the daily recommended dose of sodium. This is better by half than bacon, on par with turkey bacon, and definitely better than the morningstar strips... but still not ideal. But a little kielbasa can go a long way if it's sliced thinly. So we don't typically eat 2oz worth with our eggs.

--------------------------------

So, kielbasa is a healthier substitute for bacon. And nutrition-wise, it's pretty comparable to some of the other bacon substitutes. After doing the research and reading everything I just wrote, I'm almost ready to give a hearty, demoralized 'whoop-de-doo.'

But at the end of all of this, we're still talking about bacon and eggs. And bacon is not exactly the gold standard when it comes to healthy eating. So, take that statement without any grains of salt, since there's already enough salt in the sausage. The health issues aren't new to anyone, and this is still something that people do enjoy once in a while. Some people have turned to turkey bacon or a vegetarian equivalent. I'm just trying to offer something tastier.

Saturday, November 27, 2010

Date night! Soup in bread bowls, part 2

So, this was originally going to be cream of sweet potato and peanut soup, but we made a last-minute switch, and made cream of broccoli, instead.

We were also going to do date night on Saturday. We ended up doing it on Monday, instead.

So, part 2: Cream of broccoli soup, to go in the bread bowls!

The recipe is taken from a soup cookbook that I've had for a while.

-2 pounds (around  4-5 stalks) chopped broccoli. Separate the thick stems, peel them and chop them.
-1 medium onion, chopped.
-1 leek, sliced lengthwise and chopped
-2 celery stalks, chopped
-.25 Cup olive oil.
-1/4 Cup all-purpose flour
-1.5 Qt chicken broth
-.5 cup cream
-.5 tsp dill
-Lemon juice, salt, pepper, to taste

Chop up the vegetables. Don't be too fussy about it, they're all going to go into the blender later, and then get strained. For this reason, it's actually preferable to chop the celery as coarsely as possible... that way the fibers will be strained out more easily. Otherwise, they can get through the straining process, and end up in the final soup. I know, it's just celery. But fibers in a cream soup is really not a good texture. Good cream soup will coat the mouth, and be very comforting. A celery fiber in that context feels almost like a hair. 

Cook the vegetables in the olive oil on medium heat, stirring frequently until the onions start to become translucent. (~8 minutes) Then add the flour, and cook for another 4 minutes, still stirring frequently.

Add the broth slowly, and add the dill. Bring to a simmer, and cook for 45 minutes.

The recipe says to strain the liquids. I'm not too fussy about this step. Scoop the vegetables into the blender, hold the lid down, and puree. I typically fill the blender cup half-way, because if the cup is too full, the stirring hot liquid heats up the remaining air, and the pressure pops the lid off a little bit. It's messy.

Puree the soup, and then strain into a new bowl or pot. Season to taste.
--------

And, the money shot: cream of broccoli served in the bread bowls:


The experience was similar to last time. The soup itself is great. So, we each had seconds. And then we started working on the bowls, and felt almost immediately full. My theory is that the dough for the bread bowls is so full of whole grain goodness (oat flour, oatmeal, and oat bran, in particular) that it all swells up almost immediately in the stomach. Neither of us could finish eating the bowls. So, if you're planning a nice dinner for two, my suggestion is to scoop out more of the bread bowls, and leave dinner as a single-serving kind of meal. Alternately, if you're feeding a crowd, use regular bowls for the soup, and serve the bread, cut up into pieces, or crumbled, to put into the soup. The dough will soak up the soup very well, and turn it into a stew-like texture that is very, very filling.

Friday, November 19, 2010

Date night! Soup in bread bowls, part 1

Once in a while, we like to have a quiet date night at home. It's a good excuse for me to pull out some more involved, or fancier recipes. This entry is the first of what will be an ongoing segment on date night meals.

I've been making cream of sweet potato and peanut soup for years. Last week I got ambitious, and decided to serve this soup in home-made bread bowls. It turned out very well, and I was very sorry that I hadn't documented any of it. So, I'm making it again. : )

Edit, 11/27/10: So, I was going to make cream of sweet potato. I'll make that another time. We ended up making cream of broccoli soup instead. 

It's important to remember that bread bowls must be made at least a day in advance. The reason for this is that you want the crust to dry out a little bit. Fresh out of the oven bread is still a little soft, and adding soup to a soft bread bowl is a recipe for disaster, as it will soak right through the outer layer of bread, and the bowl will fall apart.

The bread I used for the bowls was a loaded up variant of the basic honey-wheat bread I wrote about a few weeks ago. This is one of the great things about bread... it's really easy to successfully improvise. The nutmeg was an inspired touch, and it worked very well with the soup. That said, it did make for an odd-taste when used in sandwiches.

 Date night is tomorrow night, so I'm baking these today.

Nutmeg-Multigrain Bread Bowls:

This bread has the following ingredients:
-3 Cups all purpose flour
-2 Cups Whole Wheat flour
-2 Cups Oat Flour
-A handful of oat bran
-A handful of wheat bran
-A handful of quaker oatmeal
-Peel from one lemon, grated
-1 Tsp salt
-1 Tsp Nutmeg
-1/4 Cup or more of honey
-a little bit ( 1Tbsp? I didn't measure) of black strap molasses*
-3 Tbsp melted butter
-around 2.5 cups of warm water.


It's a nice, dense dough, full of all kinds of wholesome stuff. It's a little sticky at first, because there's a lot of water. Oat flour and oatmeal are known for being absorbent, so this does go away.

Follow normal bread-making recipe procedure. But instead of forming two big loaf, form the dough into 4 ball shapes. Then let them rise, and put them into the oven.

To be continued...

---------------------------------------------------------------------

*Black strap molasses is not to be confused with regular molasses. The first time I ever heard of black strap molasses, no kidding, was in a Bugs Bunny cartoon. This pretty much guaranteed that I would end up seeking it out. I'm glad I did: Black Strap is really healthy. It's basically the by-product of making sugar, and it's loaded with nutrients and minerals. Only 2 tsp of Black strap provides 13.3% of the recommended daily dose of iron, 12% of calcium, 14% of copper, 18% of manganese, 9.7% of potassium, and 7.3% of magnesium. All of these things are important and good for you. If White sugar is pure calories that's been stripped of anything healthy, Black strap is the dumping ground for sugar's missing nutritional value. And it tastes great in morning coffee.

Thursday, November 18, 2010

A few of my favorite things

I just wanted to make a quick post, to sing the praises of a few things that have made this kitchen a pleasure to cook in, instead of the nightmare that it could have been. 

Pot racks. I don't know how I would have survived this kitchen without them. I bought them simply because I have too many pots and pans to store easily. I still have too many, but this floating row of hooks also shines in keeping frequently used tools close at hand. A utensil holding jug or other contraption would have taken up counter space that we don't have, and not been as easy to use. (I know, we used to use one.) The usual suspects are also not in the drawer at the other end of the kitchen, where they'd be less accessible in a hurry. Instead, they're within arm's reach of the stove, where they're most useful.

Similar argument for my magnetic knife block. This particular model is made by a company named Bench Crafted. I like this particular knife holder for two reasons: It's not a big block that takes up counter space, and the surface is made of wood... so it's not going to beat the crap out of my nice, sharp knives when the magnets take hold and slam the blades in.


The food processor. It's amazing how much I'd forgotten how useful this thing was. I think I'd kept it in the cabinet for most of the last 7 or 8 years. I bought it 13 years ago when I lived in Houston, and put it away when I moved up here. I think I really started putting it back to use when I started this blog, and I gave it a designated home on the kitchen island. I'm not sure if I'm cooking more new recipes because I have the food processor at hand, of if I'm using the food processor more because I'm cooking more new recipes. Lately it's been put to use with chick pea burgers, chopping and slicing and mixing ingredients for spaghetti sauce, numerous kinds of hummus, batter for German Apple Pancakes, cabbage and onion dishes, and on and on. It's been a reliable workhorse. Don't get me wrong, I love using my kitchen knives. But the truth is, the food processor does the same job, in less time, using less space, and without needing to transfer the ingredients from board to bowl. My only real complaint is that it's not a full sized, 14 cup model. If I was regularly cooking for more than just the 2 of us, it might be more of an issue. But for now, it's just fine.

And last but not least, the unsung hero that I've been able to take for granted for years. The kitchen island. I originally found it abandoned in the basement of an apartment that I was living in a few years ago. I added wheels, I think. And I definitely added the butcher block top.  24x30 is pretty much all the room I really need for most food prep, bread making, and so on. If I'm cooking for 9 or 10 people, I'll need a little more space, but not much. There's enough storage in the bottom to hold a lot of pots and pans and 'stuff.'  I've been using this thing for almost 8 years now, and I haven't really felt the need for something bigger. After almost a decade, something newer and a little bit nicer might be nice. That notion was put in my head while building a much nicer one (sans cabinet) for my in-laws over the summer... but that's not the same thing as actually needing one. This particular detail in my kitchen is like any other well-executed detail: it serves its purpose cleanly, without calling attention to itself. It works well enough that I never notice it. In my mind, that's the ideal when you're working in the kitchen: Usually when you notice something, it's because it's not working, or not as well as it should.

One small detail about all of these things... they're all within arm's reach of the stove. In essence, I have everything I normally need, right where I need it. That makes a huge difference in everything.

Thursday, November 11, 2010

Primer for cast iron skillets (and other cast iron cookware)

We got a cast iron skillet as a wedding present. There was a short learning curve about proper care and handling, but I'm wishing now that I'd looked into cast iron sooner.

Reading up on proper handling of cast iron proved to be a seriously dark, deep rabbit hole, and I was down there for a while. There was a lot of conflicting and half-baked information. With all of the recommendations I found for using crisco, bacon fat, or lard for cooking and seasoning, I was convinced that there was no way that using these pans was going to be healthy, kosher, or vegetarian-friendly. I found my way to the truth of it, though, and I'm finally out of the rabbit hole.

The best all-around primer I found was written by a guy named Paul Wheaton. There's a lot of information there about how to properly use cast iron. The egg frying video shows just how non-stick cast iron is: it was eye-opening. The tip on putting pepper in the pan before frying an egg is worth the price of admission alone. But for all the work that he's done to show that cast iron is robust and easy to use, Paul is also very insistent on using bacon grease for almost all of his cooking. And the pictures of his seasoning process had me pretty well convinced that he was missing something, somewhere.

Thankfully, Paul also referenced a blog entry by Sheryl Canter, on the chemistry of seasoning cast iron. Paul mentions that a lot of Sheryl's science is over his head. Some of it's over mine, too. But even though I haven't read up on the formation of polymers, she thoroughly spells out her logic and process, and details her results. Her explanation of her choice of oil to use when seasoning a pan made a lot of sense to me. And the photos of her seasoned pans convinced me that her scientific approach was far superior to the dogmatic, my-grandpa-said, "it's always done this way" approach of some of the other sources I found online. Sheryl's use of flax seed oil (Food-quality linseed oil, sold as an Omega-3 supplement), solved the kosher/vegetarian issue for me. And as a nice counterpoint to Paul's methods, Sheryl makes a good, if scary point about cooking with bacon grease:

"Since lard is traditional but no longer readily available, many people substitute bacon drippings, but this is a bad idea. If it’s conventional bacon, you’re baking in carcinogenic nitrates. But even organic bacon is not good for an initial seasoning because it’s filled with salt."

It's worth the time to go read the pages I mentioned above. Paul's for day to day use, and Sheryl's for seasoning and restoration. But these are what I consider to be the high points for restoring cast iron cookware:

-When stripping vintage cast iron cookware, use oven cleaner that contains lye, and bag the thing up while the lye goes to work. 24 hours later, put gloves on, take the pan out, and scrub off all of the black that you can. Repeat this process until the whole pan is down to bare, gray iron. Some of the professional resellers simply keep a lye bath in a plastic tub in their garage, and soak the pans for a few days. I'm not that fanatical or dedicated.

-Pre-heat the skillet before adding ANY oil.  If there is any water left in the pores of the skillet (and cast iron is very porous) the oil will not adhere. Once the pan is hotter than the boiling point of water, it will be absolutely bone dry. Since I'm already going to be seasoning the pan in the oven, I simply put the pan in while the oven is pre-heating.

-Season with flax seed oil. Heat the oven to 450-500 degrees. (whatever your max temp is) Wipe a very thin coat of oil on the pan, and then wipe off as much oil as possible. Then put the pan in the oven to basically burn the oil onto the pan. I left the skillet in the 500 degree oven for an hour, and then left it in there to cool after I turned the oven off.

---My experiences so far---

When I first got my little Griswold #3 in the mail, it was a mess. I scrubbed it down and tried to re-season the bare spots. I had a hard time. I tried olive oil, canola oil, crisco... all without any success. (I was also applying heavy coats to freshly washed, wet iron, which is not a recipe for success.) So, I finally took the whole thing to the sink and scrubbed out the black mess. And this is more or less the way it looked when I got it. I have a quiet suspicion that the reason it looked like this is because the previous owner had given up on trying to figure out how to properly season it. The bottom of the pan in particular was very thickly layered with caked on black stuff, and I could barely make out the Griswold logo.

After several failed attempts, and after reading Sheryl's blog entry, I decided to strip the whole thing down and start from scratch. I sprayed the pan down with oven cleaner and put it in a plastic bag. 24 hours later, I scrubbed it down, and decided it needed another round, so I sprayed it down again, with a heavier coat, bagged it up, and left it.

I was still left with a small patch or two of the original seasoning. I've given it a good scrubbing with some abrasive powders, and scraped at it with a table knife. It came off. Next step was to dry and bake the pan, which I did while pre-heating the oven for seasoning. It came out of the oven looking a little orangey in spots, which is to be expected. Water on cast iron results in rust. Oil gets rid of rust, so as soon as I gave it a good coating, all the orange disappeared.


This is what the pan looks like after the first coat getting baked on. It's a clean, matte finish. There are a few surface blemishes, but the coating is hard, and has a nice, even color to it.


After 5 coats, it's a nice brownish-black color. It's not glassy smooth just yet. I'm guessing that time and use will get it there. That's one of the nice things about cast iron: ongoing use will improve the non-stick quality of the pan. With all of the made-to-break cookware out there, it's nice to finally have something that has the potential to age gracefully, and the option to be user-repairable if it doesn't.

---
Update, 11/15/10

I realized a few weeks ago that smaller skillets don't seem proportioned for full-on cooking jobs. My reasoning... there's really not much room to move a skillet around in there. Rather, they seem proportioned for cooking up a single serving of a particular recipe, such as the German Apple Pancake recipe I discovered recently. So, my logic being what it is, this seemed like a good reason to pick up a second #3 sized skillet... so I could cook for two. This time I got an even older Griswold.

One of the things I'd read while I was down in the rabbit hole was that older skillets had a much better surface finish, and that the older Griswolds were superior in this regard. This seems to be true. Not only is the surface cleanly machined, but it lacks the concentric machining circles that are visible in the skillet above. Instead, it looks nicely sanded. And while the pan definitely needs to be reseasoned (it's in the oven now) it was glossy enough in spots when I got it that I have high hopes for this little skillet.

More later, this entry is long enough as it is.

Morning Muesli

I can't speak for everyone else, but I get stuck in a vicious cycle sometimes when it comes to thinking about things like the Mediterranean diet. I agree that it sounds great, I don't dispute the data that indicates that it's a healthier way to eat. But when it comes to thinking about actual meals, I completely come off the tracks.

7AM, coffee is brewing, this is not the time to try to think about what somebody on a whole other continent would eat for breakfast. How the hell do I know what they eat in the morning? Do they even drink coffee that early? I ran to Google, and one of the first links that came up explained that it was normal for Italians to eat cake and cookies for breakfast, and bacon and eggs for dinner. On the one hand, this is a meal plan I can get behind. On the other hand, even the demon on my shoulder is spouting a truly rich blend of profanity at the idea that this is being passed off as a healthy diet.

(Granted, the angel on my other shoulder has a foul mouth, too. I'm a complicated man.)

I don't think that regular Bircher-Benner Muesli is something I'd consider to be Mediterranean. I tend to think this because it's actually Scandinavian. But the basics are all there... whole grains, fruits, and yogurt. So, it's a stretch, but a comfortable one for me. My typical instinct these days is just to fry up a couple of eggs and some Kielbasa. Or eat processed cereal. Once in a while I'll go for oatmeal. Muesli seems like a healthier option.

Oatmeal, dried fruits and nuts, seeds, and so forth, is a good base. Chopped up apples adds a little more to the mix, and a few sliced grapes. The traditional version, according to the Mob-o-cratic internet, has a lot more fresh fruit than dried fruit, and the yogurt is just there to hold everything together, and soften up the grains.

The typical Swiss method of preparing muesli is to make it the night before, mix it in with some yogurt, and let it soak overnight. I'm in a much better mood in the evening, and all cylinders are firing. So I'm more likely to choose a healthier recipe. The concept of preparing the morning's meal when I'm actually awake (and not waking up) has proven to have a lot of merit.

Monday, November 8, 2010

Cold Weather... time for Cocoa

November's here. Daylight Savings is here. And at this very moment, it's raining outside. Cold, Dark, and Rainy. And few things make such days bearable like good cocoa.

I've done a lot of experimenting with making cocoa... what to mix in, what to leave out. I've even managed to make a really good cocoa using soy milk... but that's another story. I've settled on a few basics.

-Cocoa powder. I've used instant cocoa, I've used valrhona powdered bittersweet chocolate. There is a difference. But there's more to good cocoa than just the powder that's used. If you have the money, and you're a serious chocolate fiend, feel free to spend the extra cash.

-Use whole milk. Lowfat milk is acceptable skim will do, and even soy milk can be remarkably not bad, in a pinch. Don't make cocoa with water if you can help it.

-Sweeten with honey, not sugar. It's thicker, which helps, and the flavor is a lot mellower, and richer. Honey is the key ingredient for those of you who can't stomach milk, as it will even make soy milk work in this recipe.

-A splash of vanilla extract, if you have it. Coffee Liqueur is even better.

-A dash of chili powder. I know, I know, it sounds downright blasphemous. But chili-cocoa is a reason to Believe. The flavors blend in truly unexpected ways, and I, for one, have been unable to go back to regular cocoa. Use a small amount, and add carefully.

I've had some success with other additives in moderation, such as:

-coffee
-cream
-raspberry jam (I think this is one of the things that helped the soymilk recipe work)
-black pepper
-red pepper
-Bailey's
-Kahlua
-rum
-peppermint


Last, and most important ingredient: Time.

Good cocoa is like a good hug. It's not something that's properly savored or enjoyed on the fly, or while working.

-J

Sunday, October 31, 2010

Pretty Good Hash-Browns

This morning, I feel like I turned a corner in my Sunday morning hash-brown making skills.

For starters, I used a dutch-oven style pan, with a lid. The lid helps keep in the steam, which is important for helping the potatoes get softened up. Add some olive oil, and set the burner to medium heat. I also cooked everything in layers, as opposed to cooking them all mixed up, and this seemed to help a lot.

First thing I did was chop up two onions, and deposit them in the oil to start frying. Previously I just stirred them in with everything else, but leaving them frying in the pan while I cut up the potatoes helped them to caramelize a bit, which helps. When I added the potatoes, I just dumped them on top of the onion layer, and let them there for a while, with the lid on the pan. The downside is that some of the onions on the bottom will burn to the pan. But this is easily fixable. The upside is that those same onions release a bit of sugar into the mix, which definitely helps. They also release a lot of water in the form of steam, which helps cook the potatoes.

Once the potatoes started to soften up, I added some chopped scallions, salt, pepper, and dill, stirred the whole thing up. Cook for a few more minutes with the lid still on, and then it's ready to serve.

If I wanted to add anything to the process, I'd probably add another frying pan, at a higher heat, to brown the potatoes. But that's more to clean up, and it feels like it'd be a better trick to perform on an industrial diner griddle. 

Bits and Pieces, Halloween '10

Today I'm going to put up the first of my bits and pieces series. These will be an ongoing series of little things I've noticed that help make things a little easier in the kitchen. Kinda like the 'tips and tricks' section in various craft magazines.

------------------------------------------------------------------------------
Cleaning out burnt on crap.

This is something that really eluded me for years. Some recipes, statistically speaking, are just going to burn a bunch of crap on the bottom of the pan, like this morning's hash browns. I know, some more experienced chefs would probably tell me to stir more, or do something else that's more intelligent, to reduce the likelihood of this happening.

This wouldn't be a problem I suppose if I was using industrial pots and pans in a kitchen with an industrial dishwasher, and a steam cleaner. But I'm using nice stuff, and I don't want to blast the crap out of it. I like having a smooth surface that's less likely to stick. (the irony) But still, I used to have to spend hours with abrasive cleaners, metal instruments, or whatever else, because I also wanted that nice smooth surface to be clean.

Most kids learn that hot water helps. What I've learned is that making hot water helps more. Adding water, and boiling it in the dirty pan does a lot to loosen up the worst of the burnt on crud. While it's boiling, use a spatula to help things along. Use the same kind of spatula you'd normally use... don't succumb to using metal, in the hopes that it'll do a better scraping job... it might scrape the crud out, but it'll also scrape up the pan. And not scraping up the pan was the point of using the water trick in the first place.


------------------------------------------------------------------------------


Spudges and Sponges: a dirty topic.

Sponges are not exactly rocket science. They're more like biology. And maybe a little bit of psychology, too.

Things get dirty all over the kitchen, not just in the sink. In theory, I guess clean is clean, and any sponge will clean anything if you use enough soap and hot water. But it still feels dirty to use the same sponge for everything from the floor to the stove to the dishes. Separate sponges seemed like the answer. But it seemed a little counter-intuitive to use a new, clean sponge as a dedicated floor sponge.

At some point, I had a room-mate who taught me to micro-wave my sponges. I thought he was nuts, but his logic was sound. 20 seconds in a microwave will get the sponge very, very hot. I haven't used a thermometer to measure how hot, but for sure, the sponges I pull out of the nuke-o-mat are too hot to touch for long. And that's hot enough to kill off most of the bacteria.

I understand the science. And in theory, it's great. But this is the psychology part... I know on an intellectual level that I have probably made that sponge safe to use. But I still see a dirty sponge, and I'm not really sure that I like the idea of using that sponge on my dishes.

 It's not really a nice shiny sponge anymore. Instead, I consider it to be a dirty spudge. But as long as the germs have been killed off, it's still good enough to use on the floor and for the grunt work on the stove-top. And I cut off one corner so that I can see its degraded status.

...And then I throw it back in the sink anyway.


------------------------------------------------------------------------------


Recipe Holding

One more reason why it's good to have a work island right next to the fridge: I can use magnets to hold magazine recipes. That way they're out of the way, they won't get stained or destroyed, and I can still refer to them while I'm making a mess on the work surface.


------------------------------------------------------------------------------

Happy Halloween, y'all.

Tuesday, October 19, 2010

Basic Bread, Part Three: A good first loaf

This is a recipe I came across in a book on bread making. It's simple, to the point, and has awesome, abundant flavor. It's also a whole wheat bread, which helps with flavor, and with glycemic load. The ingredient list is a little more involved than basic white bread, but the process is just as simple.

Ingredients:
-3 Cups all purpose flour, plus extra for kneading
-3 Cups Whole Wheat Flour
-2 Tsp salt
-1 package (or 2 1/4 Tsp) of quick acting dry yeast
-1-2 Tbsp grated lemon peel
-1/4 Cup Honey
-3 Tbsp Shortening (I use Melted butter... no trans-fat issues.)
-2 Tbsp Brown Sugar (for priming)
-2 1/4 Cup of warm water

The only prep work that really needed to be done to an ingredient was to the lemon peel. I saved the peel from the lemon that I squeezed into last night's dinner for the bread I made today. After a day of drying out a bit, I was able to pull out the seeds and the remaining pulp. I cut out the stem and any other undesirable parts, and tossed the rind into the food processor with the mixing blade. I pulsed it a few times to help break it up, and then just left the machine on. The rind bounced around and got cut into hundreds of pieces. Good enough for me.

The first part of the bread making process is something called priming or proofing the yeast. The process is simple: throw the yeast into a glass of warm water, with the brown sugar. Very soon, if the yeast isn't too old, you should see signs of vigorous activity, in the form of foam on top of the mixture. In this case, it took about 10 minutes to get a small pile of foam going.

While the yeast is proofing, mix up the flour and the salt. I used a whisk to blend the two types of flour and the salt together, to make sure that they were evenly mixed. The other reason to do this is to fluff up the flour a little bit, to help it move around and mix well. It makes for a lighter end product, whether it's bread, cookies, or whatever.

Once the yeast is ready, it's time to make the dough. Pour the yeast mixture, the rest of the (Warm) water, the lemon, honey, and melted butter into the mixing bowl with the flour, and mix with a wooden spoon for a minute or two. The dough should come together pretty quickly, and once it's solid enough to work with, it should be dumped out onto a clean, floured work surface, to be kneaded.

Some bread books will advocate adding ingredients slowly as the dough is being mixed. I don't. Mixing the dry ingredients early on ensures that there won't be lumps and pockets of one thing or another. Kneading the dough will help mix everything else in, and there's nothing wrong with kneading the dough for a while if you feel like it. It's a lot easier, and more rewarding, to work with kneadable dough on the counter than it is to mix a sticky mess in a bowl.

Keep the extra flour handy as you're kneading the dough. Keep the dough from sticking to the work surface. As you knead the dough, if you feel like it's too sticky, add some flour. Throw it on the work surface to add it in: the dough will take up what it needs to get to where it needs to be. If the dough is too dry, add a little bit of water. If you've never handled dough before, it takes a bit of time to get a feel for how it "should" be. It should start to feel slightly elastic after a couple of minutes.

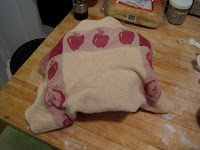
Once the dough has been thoroughly kneaded, (10 minutes or so) roll it into a ball, and cover it with a clean dish towel for the initial rise. I recommend adding a little more flour to the work surface before you do this. Or, if it's cold-ish in your kitchen, (this being October and all) put the dough in a lightly oiled wood or plastic bowl before covering it up. I specify those materials because metal or glass will conduct heat away from the dough and cool it down, which isn't good for bread dough. Let the dough sit for 20 minutes or so. (This is a good opportunity to clean up the tools you used earlier, in particular the mixing bowl, so it doesn't get encrusted with dried out bits of dough.)


After the initial rise, cut the dough in half, knead each piece a little bit, to get out some of the bubbles. This helps mix things up just enough to put the yeast back in touch with new, untapped pockets of food. You may notice that the dough has become more elastic as the gluten chains have formed. Let the dough sit for a minute or two, and then shape each lump into a ball, ("boule," is the bread term) tucking ends and edges underneath. Then set the boules aside, covered, and let them rise at room temperature for an hour or two... the goal is for the dough to double in size. If your kitchen is really warm, keep an eye on the dough; the yeast will be very active, and you don't want the dough to rise too much. Pre-heat the oven to 425 degrees towards the end of the rise.

Once the dough has gone through the second rise, put it on a baking sheet, and put it into the oven. Turn the oven down to 400 degrees, and bake for 30-40 minutes. After this, pull the bread out, and move the loaves from the baking sheet to a cooling rack.

Warm, fresh bread is hard to beat. Even bad home-made bread is generally much better than store-bought. But either way, keep practicing. More practice will help you to learn what dough should feel like, how long it should rise, and give you a sense of what 'normal,' bread making should feel like. Gradual refinements will come with experience, and application of the scientific method. I've read of bakers who record everything: kitchen temperature and humidity, oven temps at various stages of baking, weight of the ingredients and the resulting dough, and so on... and in observing all of these variables, they begin to understand more about what's going on, and what contributes to better bread.

Basic Bread, Part Two: The Process

Making bread is a lot different from making most things. There's not much to it, but the process does take a lot of time. It's probably better to make bread when you have something else to do, too.

To give you an idea of what I mean, this was what happened as I made bread tonight:

-I mixed the yeast in with the sugar and water to prime. Then I went to go get laundry.
-I mixed the dough, kneaded it, and covered it for the first rise. Then I made dinner for tonight.
-I cut the dough in half, kneaded it a bit more, and covered it for the final rise. Then I ate dinner, cleaned up a bit, folded laundry, and put laundry away.
-I put the two loaves into the oven, and then went and wrote the first chunk of Basic Bread: part one.
-Finally, I pulled the bread out of the oven, took pictures, and finished part one.

As I mentioned in Part One, the basic science involves yeast reproducing in a pile of dough, which is made of flour and water, yeast, and whatever else you feel like adding in. Sourdough, which is a good traditional way of making bread, starts with something called sourdough starter (or a "mother"), which is basically a container of a flour and water mixture, with active yeast growing in the mix. The basic sourdough recipe calls for flour, water, a little bit of salt, and some sourdough starter. (which, again, is basically just flour and water, with live yeast growing in it.) Kneading the dough helps form gluten, which is the elastic substance that allows bread to rise, as it swells up due to the gases produced internally.

The first step in breads made with store-bought (quick-rising) yeast is to prime (or proof) the yeast. To do this, mix the yeast into a glass of warm water with some sugar. It kick-starts the process of reproduction, so that the yeast is active before it's even mixed into the dough. It also helps to let you know, before you make the dough, if the yeast is any good. If it's too old, and most of the yeast is dead, it won't reproduce, and the bread won't rise.  It's important to know, before you go any further, that your dough is going to rise. If the yeast doesn't start to reproduce, you have time to go get more yeast if you haven't mixed the dough yet. If you just add old yeast to the mix without proofing, you may be waiting a long time for the dough to rise.


Once the yeast is happily reproducing, the bread dough is mixed, and then kneaded for around 15 minutes. Kneading bread dough is a simple thing, but it's pretty frequently misunderstood. Kneading bread helps to mix the ingredients, but it also helps the flour to form gluten chains. Proper kneading stretches the dough out, and helps those chains form, which adds to the elasticity of the dough. Basic kneading is as follows: Flatten and roll the dough up a bit in one direction, and then flatten and roll from the last roll.


I've read advice to slap the dough around, and slam it down on the table, to help really stretch it out. This is good with more elastic doughs, like sourdough. For basic sandwich bread dough, which has a finer texture due to the presence of shortening or butter, is less stretchy, and doesn't really demand such violent handling. But the same source also advised to do all the kneading with one hand, so that the other remained clean enough to handle anything else that requires a clean hand. (Like the phone, or taking pictures. This is helpful advice if you can do it. Proper kneading can be a lot of work. I'm a woodworker with strong meat-hooks for hands, and it's hard for me sometimes. But I can say that it has helped to have a clean hand available from time to time.

After that, it gets covered, and left alone for about 20 minutes, for its initial rise. Put more simply, you give the yeast time to reproduce within the dough. One yeast cell splits into 2 yeast cells, into 4, and so on. The three main products of this reproductive process are carbon dioxide (CO2), alcohol, and more yeast cells. In bread, there's not enough alcohol produced to notice, and it bakes off anyway when the bread goes into the oven. But as the yeast cells multiply in an exponential fashion, and each of them is giving off more and more CO2, the dough begins to grow larger, resulting in gas pockets like these ones, which were produced during the initial 20 minute rise of tonight's loaves.

After the initial rise, the dough is cut in half (for 2 loaves) and then each lump is kneaded a little bit more, before being shaped into a ball, or loaf-shaped lump. The dough gets covered again, and left to rise for a certain amount of time, usually specified in the recipe. Some recipes call for the dough to sit in the refrigerator for a few hours, to help slow the process down and bring out more flavor. Other breads are given an hour or two for the final rise, before going into the oven.

As I said in part one, yeast needs to be kept warm if you want it to reproduce. It will generate some heat of its own in the process, but if it gets cold, it will slow down. That's why the water used to mix the dough should already be warm. For the initial rise, it's normal to cover the bread with a clean dish towel, or proofing cloth, to help insulate it and keep it warm. In cooler weather, I'll also put the rising dough in an oiled plastic bowl of some kind. I specify plastic, because it's a lousy conductor of heat. That means that if the dough is warm, it will stay warm. Metal or glass bowls will conduct the heat away, and cool the dough off, which slows the process down.

Keep the yeast warm and fed, and it will do what it does in its own time. All you have to do is wait.

Basic Bread, Part One: The Science

As with everything else, there are two kinds of people. Those who have made home-made bread, and those who haven't. Those who have can tell you that it's pretty easy. Those who haven't, seem convinced that it's a task requiring skill.

Let's start with something around the level of High School biology. Yeast is a fungus. It likes to eat, and reproduce. In fact, it's a lot like most college students in this regard.

The presence of food and warmth are basically all you need to encourage yeast to engage in reproductive activity. Again, not much different from college students.

During periods of vigorous reproductive activity, a lot of carbon dioxide is generated. And with yeast, this is also true.

Flour and water are the basics of food for yeast, but sugar works very well, too.

This is a measuring cup that has 2 heaping teaspoons of brown sugar, dissolved in warm water, with around 2 1/4 teaspoons of yeast stirred in. Watch what happens within 10 minutes.


Note the generation of a huge pile of foam-->

(Evidence of reproductive activity... yours for the viewing on the internet. Again, not unlike some college students.)


Bread is a mixture of flour and water, with yeast inside. And the yeast will continue to happily reproduce within an environment that is almost entirely composed of food.

This is the magic of bread making: Think of yeast as a bunch of college students. Provide food, and adequate warmth, and they're bound to do what comes naturally. The rest is just the process of mixing, waiting, and turning up the heat.

Think of the oven as Spring Break in Mexico. It's hotter, there's a final reproductive blowout, and then everybody gets thoroughly baked.

Monday, October 18, 2010

Chick Pea Burgers

Tonight I was digging through the folder of recipes I've cut out of magazines, and found one that came from Eating Well, for chick pea burgers with Tahini yogurt sauce. Among the ingredients: chick peas, lemon juice, tahini, and olive oil. All of these are found in hummus, which is half of Ariel's answer to the "one food for the rest of your life," question.

(Hummus and Tabouleh, mixed together, are Ariel's favoritest thing. Ever.)

So, already it sounded like a winner.

Update, 11/18/10: In the month since this was originally posted, this recipe has become a staple meal in our home. As a result of getting a lot of practice with this recipe, I've learned a few things, and edited the entry to reflect those lessons.

Ingredient list:

Chick Pea Burgers
1- can of chick peas, rinsed and drained. (I used to use 19 oz cans, I've since used 14 ox cans without changing anything else, and it works fine.)
4- scallions, trimmed and sliced
1- large egg
2 Tbsp all purpose flour
1 Tbsp chopped fresh oregano. (I used dried from a jar.)
1/2 Tsp ground Cumin. (I love Cumin.)
1/4 Tsp Salt. (Or a heavy pinch, if you don't feel like washing a little pygmy spoon)
2 Tbsp Olive oil. (Bullshit... will explain later)


Tahini Sauce
1/2 Cup- greek style lowfat plain yogurt
2 Tbsp tahini. (Sesame seed paste, you may have to look a bit to find it, but I've been able to find it at supermarkets that I didn't think would have it.)
1 Tbsp Lemon juice. (I just squeezed out a whole lemon.)
1/3 Cup chopped parsley. (More or less. I think mine ended up with a lot more than 1/3 of a cup.)
1/4 Tsp salt. (See above commentary on pygmy spoons.)

Other
2 pita bread pockets, sliced in half lengthwise (Ha... it's circular. You figure out which way is lengthwise...)
1 Beefsteak tomato, sliced

The egg, scallions, salt, flour, cumin, and oregano go into the food processor with the chick peas. Use the pulse feature, and make a coarse mixture that will form patties well.

edit: Having done this a few times, I can say that it's better to mix the egg, scallions, salt, flour, cumin, and oregano first, and then add the chick peas into the food processor. I used to dump all of the other ingredients on top of the chick peas, and it took a lot longer for those other ingredients to stir down into the mix properly. By the time it was all more or less homogeneous, it was halfway to being pureed. This way the other ingredients are mixed to form the glue that holds everything together, and mixing the chick peas from there results in a coarser mix, and better patties that handle more easily.

For the sauce, combine the sauce ingredients in a bowl and mix with a fork. It's not rocket science.

Next step, make patties with the chick pea mixture, and fry them at medium high in a frying pan, in the olive oil. Be careful when flipping them, as they will come apart pretty easily.

In the ingredient list, the quoted quantity of EVOO is 2 tbsp. This is bullshit, and you should pay it no mind. A more liberal application of oil is required, to help conduct the heat to the patties. For those of you who have a cast iron skillet that can handle 4 patties, I suggest you use it, as cast iron holds heat very well. It's a minor thing, really... frying these things up wasn't hard, but I do have a reason for thinking this.

Generally, I find that foods that are allowed to heat up more gradually do not get that crispy-fried crust on the outside. I've had friends that cooked falafel in aluminum pots, or with not enough oil, and the result was a mess. The aluminum conducts some of the heat away, and the falafel dough (if that's the proper term) cools the oil down even more if there's not enough oil in the pot to compensate. So, the oil didn't stay hot enough to make the falafel balls crust over, and the result was lumpy cooked chick pea paste, in oil.

Using a cast iron skillet to fry these up makes a WORLD of difference. Instead of the slowly building sizzle that I'm used to with our old aluminum and stainless frying pans, the patties start to sizzle the instant they hit the pan. And this instant-frying makes a much crispier outer crust. As a result, I've discovered I actually need less oil.

The patties are served up in the pita pockets with the sauce, and a slice of tomato. Extra pita can be used to help clean up the extra sauce that's typically left over.

This was probably one of the fastest, easiest things to make that I've cooked in a while, and it was really, really good. We'll be making this one again.


One very happy nursing student.